Building your own DIY pull up bar is one of the smartest fitness upgrades you can make at home. It’s inexpensive, customizable, and requires only a few basic tools. Whether you live in a compact apartment or have space for an outdoor setup, creating a pull-up bar tailored to your needs ensures strength training is always within reach.
This guide walks you through everything—materials, design types, step-by-step instructions, and safety considerations—to help you build a reliable and long-lasting setup.
Why Build a DIY Pull Up Bar?
A pull-up bar is the cornerstone of upper-body workouts. It strengthens the back, shoulders, arms, and core. Store-bought options can cost anywhere from $100 to $300, but a DIY version often costs under $80 and can be customized to fit your ceiling height, wall structure, or outdoor space.
Beyond saving money, building it yourself gives you:
- Full control over size, height, and placement.
- The satisfaction of creating a gym-quality structure with your own hands.
- A durable setup built from heavy-duty materials like galvanized steel and treated wood.
Types of DIY Pull Up Bars

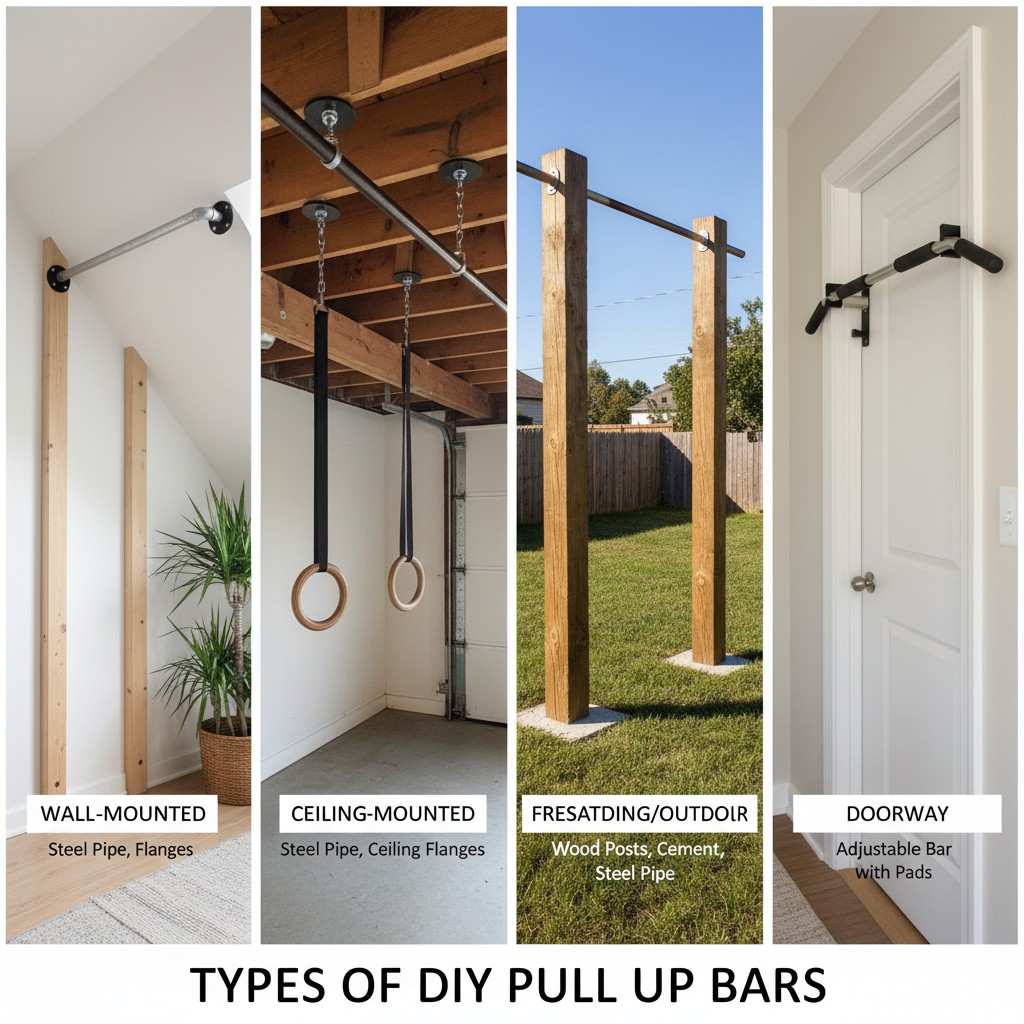
Before you start, decide which design suits your space and comfort. Here are the most common setups:
| Type | Best For | Installation | Estimated Cost | Key Materials |
| Wall-Mounted | Indoor home gyms or lofts | Mounted to wall studs | $50–$70 | Steel pipe, flanges, lag screws |
| Ceiling-Mounted | Garages or basements | Anchored to joists | $60–$80 | Steel pipe, ceiling flanges |
| Freestanding/Outdoor | Yards or open spaces | Set in concrete | $70–$100 | 4×4 wood posts, steel pipe, cement |
| Doorway | Renters and small apartments | Pressure-fitted | $30–$50 | Adjustable bar with pads |
Each design delivers the same strength-training benefits but differs in setup complexity. Wall-mounted and outdoor versions are the most stable and long-lasting.
Materials and Tools You’ll Need
For Indoor (Wall-Mounted) DIY Pull Up Bar
Materials
- 1 galvanized steel pipe (¾-inch thick, 48 inches long)
- 2 galvanized steel pipes (¾-inch thick, 10–18 inches long)
- 2 galvanized 90° elbow pipe fittings (¾-inch)
- 2 galvanized floor flanges (¾-inch)
- 8 wood lag screws (¼-inch x 3.5 inches) with washers
Tools
- Stud finder
- Drill and drill bits
- Level
- Tape measure
- Socket wrench
- Pencil
For Outdoor (Freestanding) DIY Pull Up Bar

Materials
- 2 pressure-treated wood posts (4×4 or 4×6, 10 ft long)
- 1 galvanized steel pipe (1–1⅝-inch diameter, 4–6 ft long)
- 2 bags of quick-set concrete
- 2 metal flanges or galvanized bolts with nuts and washers
Tools
- Post-hole digger
- Level
- Shovel
- Drill
- Wrench
Build an Indoor Wall-Mounted Pull Up Bar

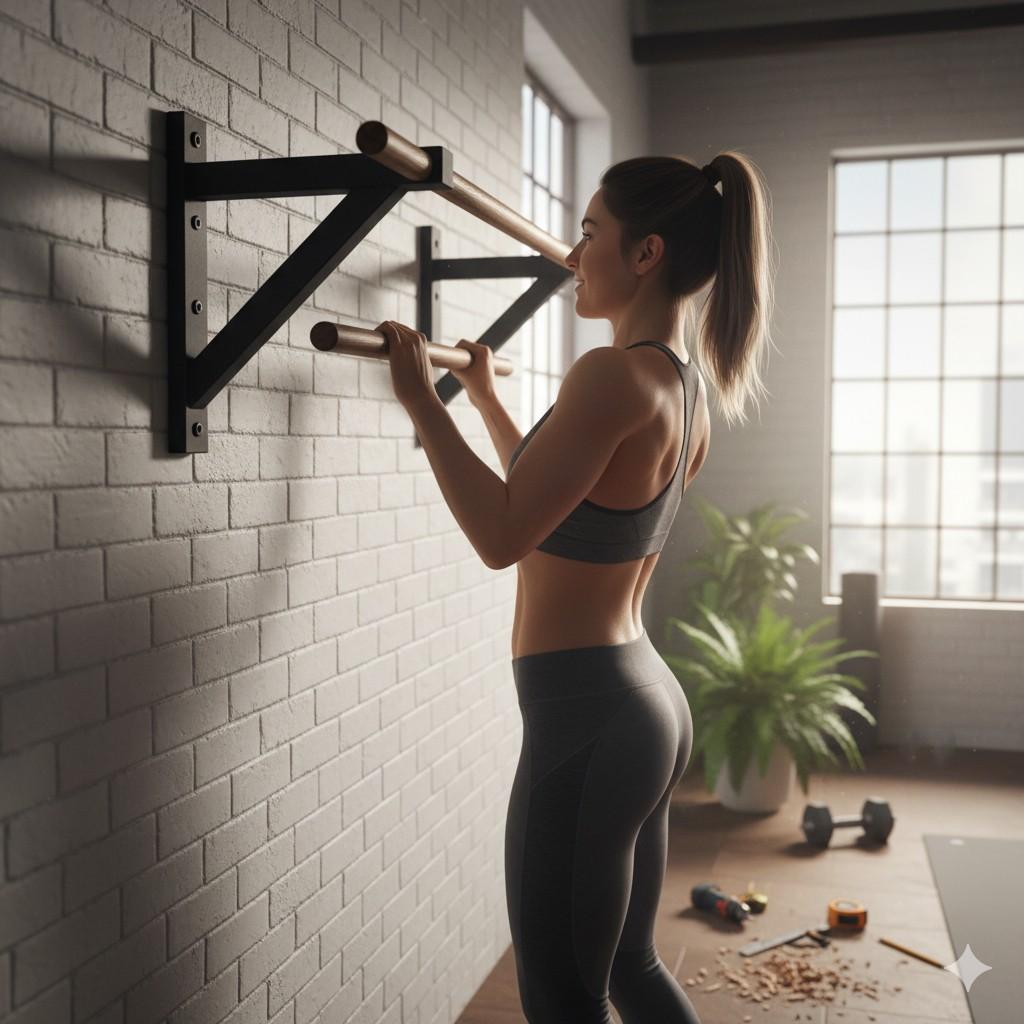
1. Find the Studs
Use a stud finder to locate two vertical studs spaced about 48 inches apart. Mark them with a pencil.
Tip: Never mount directly into drywall—it won’t support your weight.
2. Assemble the Bar
- Thread one end of the long pipe into a 90° elbow fitting.
- Connect a 10–18-inch pipe to the other end of the elbow.
- Attach a floor flange to the open end of the short pipe.
- Repeat for the other side.
You now have a sturdy bar frame ready for installation.
3. Mark and Drill
Hold the bar assembly against the wall at your preferred height (usually around 7–8 feet). Use a level to ensure it’s straight. Mark the flange screw holes, then drill pilot holes slightly smaller than the lag screws.
4. Secure the Flanges
Attach both flanges using lag screws and washers. Tighten firmly into the wall studs using a socket wrench.
5. Test for Stability
Before doing a full pull-up, gently hang from the bar to test its strength. If it feels solid, you’re ready to train.
Build an Outdoor Freestanding Pull Up Bar

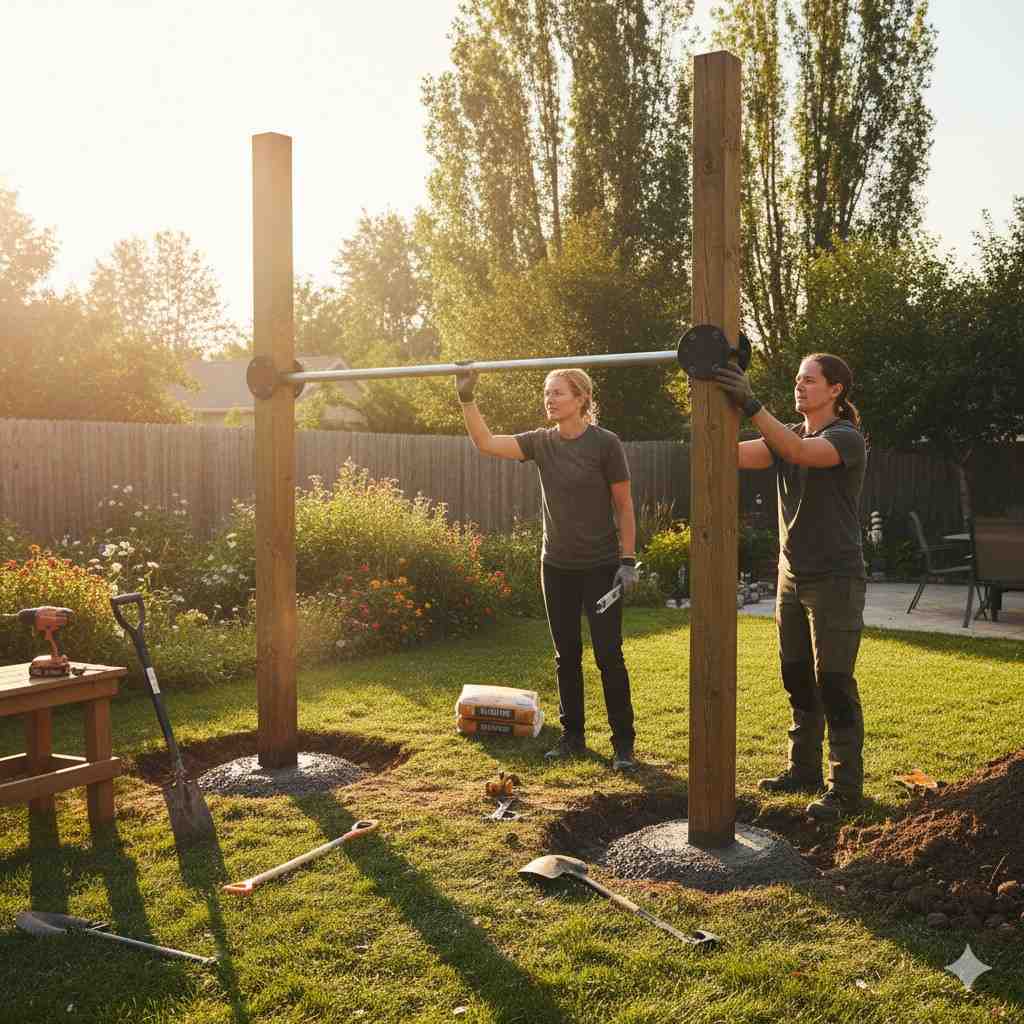
1. Measure and Dig
Mark the post locations about 4 feet apart. Use a post-hole digger to create two holes, each 3 feet deep.
2. Prepare the Posts
Drill a hole through the top of each post wide enough for your steel pipe. The bar should sit about 7–8 feet above the ground once installed.
3. Insert and Align
Place the posts into the holes and insert the steel pipe through both. Use a level to make sure the bar is straight and even.
4. Set with Concrete
Mix quick-set concrete and pour it into the holes until the posts are secure. Allow the concrete to cure for at least 24 hours.
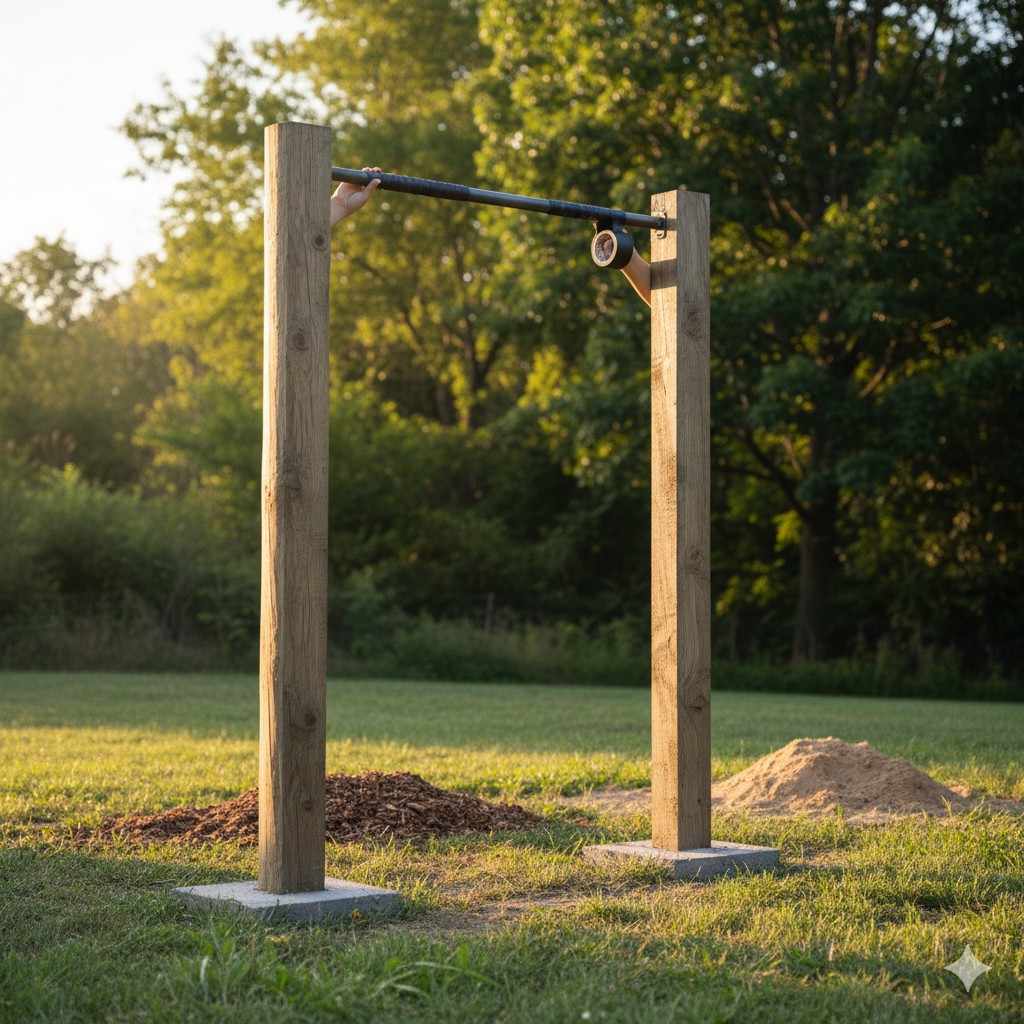
5. Add Grip and Finish
Wrap grip tape or athletic tape around the pipe for comfort. You can also paint or seal the posts to protect against weather.
Safety and Maintenance Tips
- Always anchor indoor bars into studs or joists, not drywall.
- Test stability before each workout.
- For outdoor bars, check periodically for rust, loose bolts, or wood rot.
- Avoid using plastic or low-grade metal pipes—they can bend or break.
- Keep the bar height high enough so you can hang freely without your feet touching the ground.
With proper installation and maintenance, a DIY pull up bar can last for years and withstand regular workouts.
Customization Ideas
Once your basic structure is ready, consider adding:
- Parallel dip bars for triceps and chest workouts.
- Gymnastic rings for functional training.
- Resistance bands for assisted pull-ups or stretches.
- Paint or weatherproof coating for outdoor durability.
These upgrades transform your DIY setup into a complete bodyweight gym.
Cost Breakdown
| Component | Indoor Setup | Outdoor Setup |
| Steel Pipe & Fittings | $25 | $30 |
| Mounting Hardware | $10 | $15 |
| Wood Posts | — | $25 |
| Concrete | — | $10 |
| Tools (one-time investment) | $20–$30 | $20–$30 |
| Total Estimated Cost | $55–$75 | $70–$100 |
You’ll likely spend less than half of what a commercial pull-up station costs—and get a sturdier, tailor-made setup.
Benefits of a DIY Pull Up Bar

- Budget-Friendly Fitness – Save hundreds compared to buying commercial gear.
- Durability – Galvanized steel and treated wood handle outdoor conditions well.
- Customization – Choose exact bar width, height, and grip type.
- Versatility – Ideal for pull-ups, chin-ups, leg raises, and hanging core workouts.
- Minimal Space Requirement – Perfect for home gyms, garages, or backyards.
Also Read: paper crafts for kids
Frequently Asked Questions
1. How much weight can a DIY pull up bar hold?
When properly installed into wall studs or concrete, a steel pipe pull-up bar can support 250–400 pounds, depending on the materials and mounting.
2. Can I install a pull-up bar in an apartment?
Yes, but use a doorway or removable wall-mounted design to avoid damaging walls. Always confirm your wall structure before drilling.
3. What type of steel pipe is best?
Galvanized steel is ideal because it resists rust and supports heavy loads. Avoid PVC or aluminum—they lack strength.
4. How tall should a pull-up bar be?
The standard height is 7–8 feet from the ground, allowing full arm extension without your feet touching the floor.
5. Can I add other exercises to this setup?
Absolutely. You can integrate resistance bands, ab straps, or rings to increase exercise variety.
Final Thoughts
A DIY pull up bar is more than a weekend project—it’s an investment in your health and independence. With the right materials, accurate measurements, and careful installation, you’ll have a professional-grade training tool for a fraction of the cost. Whether mounted on your wall or standing proudly in your backyard, your pull-up bar will keep you strong, motivated, and proud of your handiwork every time you grab the bar.


